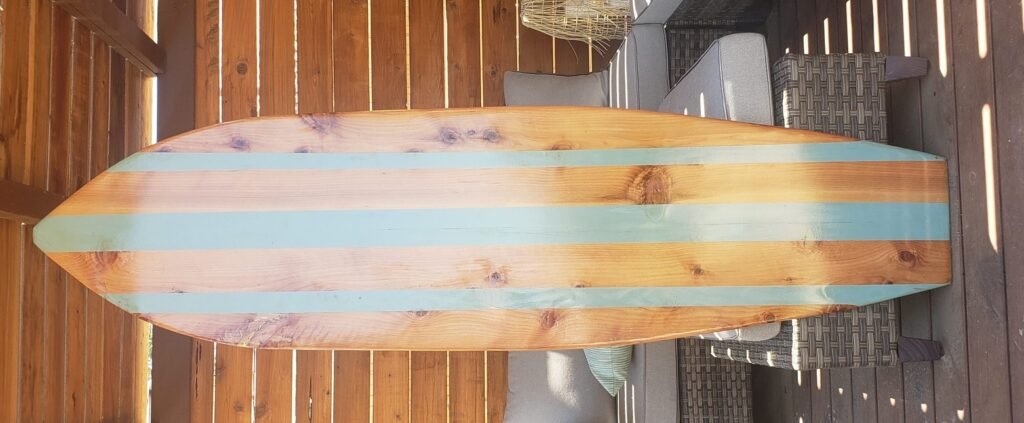
If you like woodworking projects that also make a strong visual piece, surfboard wall art is a good one. It gives you a chance to turn basic timber or scrap wood into something decorative, useful for a room, and satisfying to build in a small garage shop.
This project is less about perfect furniture-level joinery and more about shape, texture, sanding, and finish. That makes it a good build for using up wood that still has life left in it.
Why Scrap Wood Works Well for This Build
- It keeps the cost down
- Natural marks and colour changes can add character
- It is a good way to use timber that might otherwise be wasted
- Wall art does not need to handle the same kind of stress as furniture
- It is a practical garage-shop project with visual impact
That is one reason this kind of build works well with offcuts, discounted boards, or timber with flaws that would be a problem in other projects.
Finding the Wood
You do not need perfect boards for this. In fact, slightly rough, marked, or mixed pieces can make the final surfboard look more interesting. The key is to choose timber that is still solid enough to glue up and shape properly.
- Look for longer boards if you want a bigger wall piece
- Avoid wood that is too rotten or badly split
- Think about colour and grain before glue-up
- Use flaws as part of the design where they make sense
How the Build Comes Together
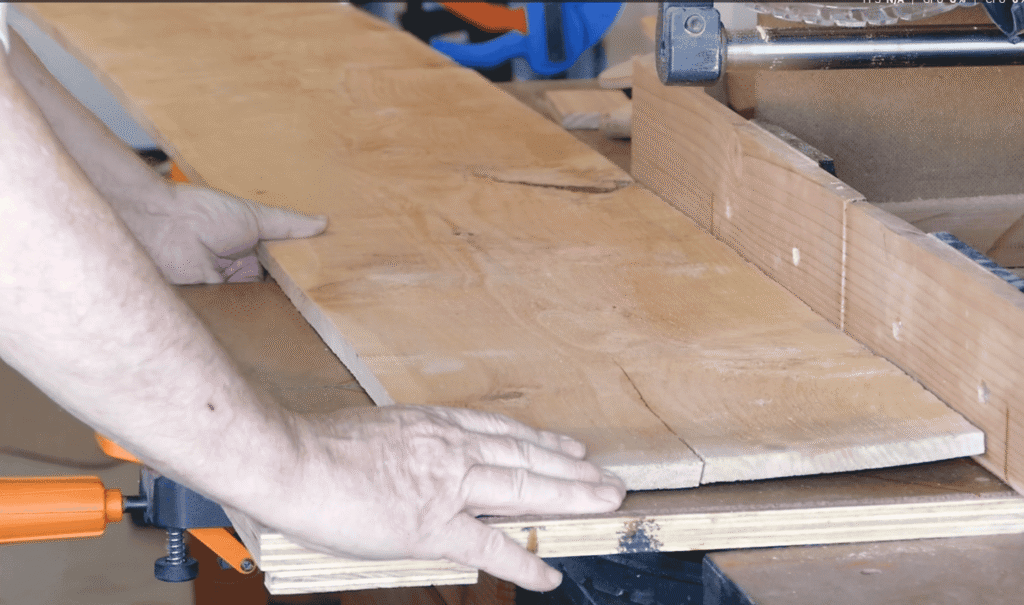
- Cut the boards into workable strips. This helps you arrange the panel and manage the glue-up more easily.
- Lay out the pattern. Move the pieces around until the grain, colour, and flaws look right together.
- Glue up the panel. Clamp it evenly and keep it flat while it dries.
- Mark the surfboard shape. Use a template, sketch, or reference shape that fits the look you want.
- Cut the outline. A jigsaw works well for this part.
- Sand and refine the shape. This is where the project really starts to come alive.
- Apply the finish. Oil, stain, or varnish depending on the look you want.
If your panel glue-ups need a bit of work first, this post will help: How to Do a Wood Glue-Up Properly Without Warping.
Shaping and Sanding Matter More Than Fancy Materials
This type of project gets most of its finished look from the shaping and sanding stage. Once the outline is right and the surface is cleaned up properly, even rough-looking boards can come together into something that looks intentional.
- Start with a rougher grit to remove splinters and uneven spots
- Work through the grits instead of jumping straight to fine sanding
- Ease the edges so the shape feels finished
- Let the grain and imperfections become part of the character
Finishing Ideas
- Clear finish to keep the wood looking natural
- Teak oil or similar oil finish to deepen the tone
- Gloss coat if you want more of a polished surf-style look
- Painted accents if you want a more decorative coastal style
- Hidden cleats or secure wall mounting on the back
Why I Like This Project
It is creative without being too complicated. It uses woodworking skills in a practical way, but it also leaves room for your own style. That makes it a good project for a hobbyist shop, especially if you like builds that are a bit different from standard shelves or shop jigs.
It also shows that not every useful woodworking project has to be furniture. Sometimes a strong decorative piece is worth making just because it looks good and teaches you something along the way.
Watch the Build Video
If you want to see the full build, watch it here:
Watch the surfboard wall art build on YouTube
If you want more practical garage-shop builds, tool ideas, and woodworking as I learn along the way, you can subscribe to my YouTube channel here.