If your miter saw leaves rough edges, small offcuts drop into the gap, or cuts feel less supported than they should, a zero-clearance fence is one of the easiest upgrades you can make. This guide covers what it is, why it helps, and the basic way to build one. If you want the exact version I built in my own shop, read How I Built a Zero-Clearance Fence Table for My Sliding Miter Saw.
What Is a Zero-Clearance Miter Saw Fence?
A zero-clearance miter saw fence is a simple add-on that supports the workpiece much closer to the blade. Instead of leaving a wide open gap around the cut line, it creates a tight slot where the blade passes through. That extra support helps reduce tear-out, improves control on smaller pieces, and makes the saw more practical for detailed work.
It is a basic shop upgrade, but it can make a real difference in how clean and controlled your cuts feel.
Why It Helps
- Gives better support close to the blade
- Helps reduce splintering and tear-out
- Makes smaller pieces easier to handle
- Can improve confidence and control during cuts
- Costs very little to make from basic materials
Best Materials to Use
- Plywood for a solid, low-cost option
- MDF if you want a flat and smooth surface
- Hardwood if you want something more durable
- Laminated sheet material if you want less friction
For most garage-shop builds, plywood or MDF is enough. The key thing is that the material stays stable and fits your saw properly.
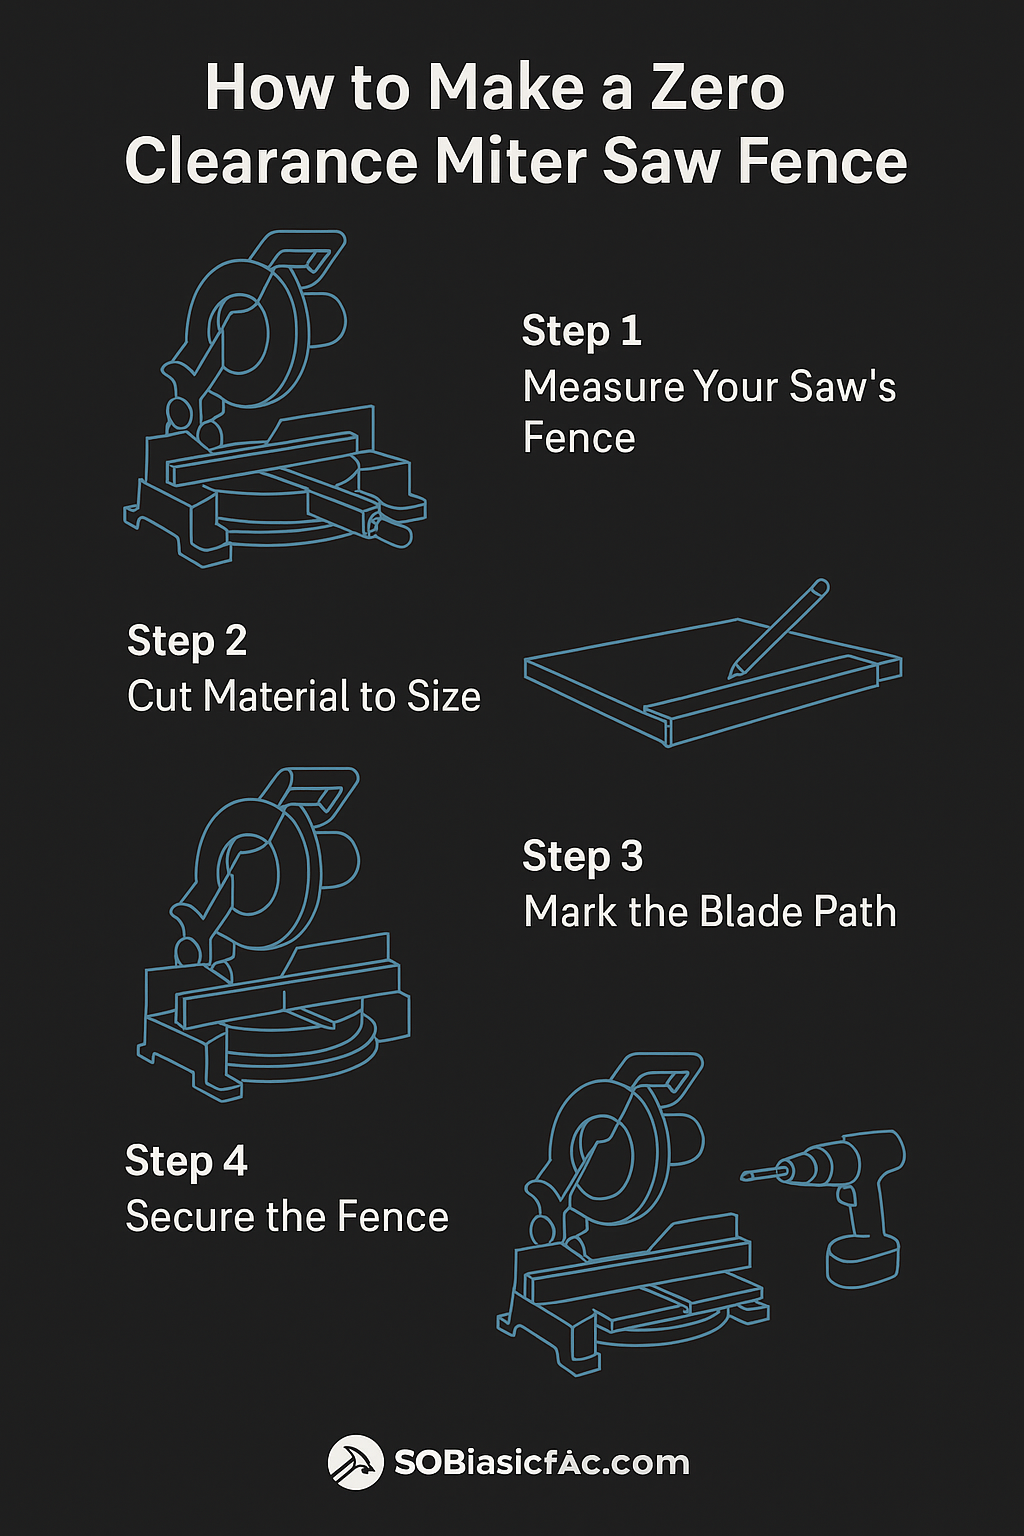
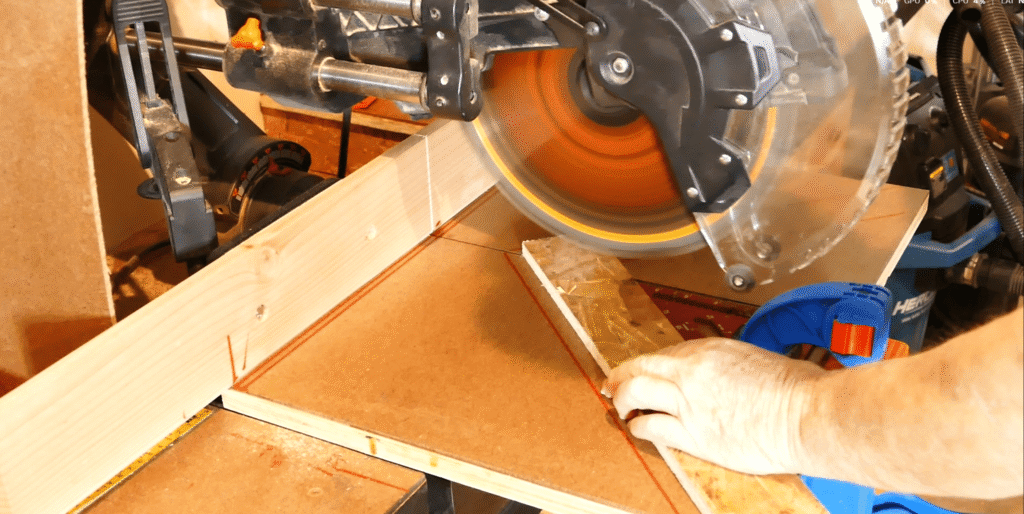
How to Build a Zero-Clearance Miter Saw Fence
- Measure your saw fence. Check the height, length, and any areas that need clearance.
- Cut the material to size. Make a fence piece that matches your saw and gives proper support.
- Dry fit it first. Set it in place and make sure it clears the saw and lines up where you want it.
- Secure it safely. Fix it using screws, clamps, or the method that suits your saw and setup.
- Create the zero-clearance slot. With everything set correctly, bring the blade through the new fence to create the cut line.
If you want the full build version from my own garage workshop, go here: How I Built a Zero-Clearance Fence Table for My Sliding Miter Saw.
If you are still setting up your saw and shop space, this also fits well with Small Woodworking Shop Setup: Make the Most of Your Space.
Tips for Better Results
- Use material thick enough to stay rigid
- Check alignment before making the first cut
- Keep extra inserts or replacement pieces if needed
- Make separate setups if you use common bevel angles
- Test on scrap before using it on finished work
Common Mistakes to Avoid
- Using material that is too thin and flexes
- Forgetting to allow for bevel movement
- Rushing the first cut through the fence
- Letting the fence interfere with the saw’s normal safe operation
Frequently Asked Questions
Is a zero-clearance fence worth it for beginners?
Yes. It is one of the simpler upgrades you can make, and it can help newer woodworkers get cleaner cuts with better support.
Can I build one for any miter saw?
In most cases, yes. The measurements and fixing method may change, but the idea is the same: build the fence to suit your specific saw.
What material should I use?
Plywood and MDF are the most practical starting points for most people. Hardwood can last longer, but it is not necessary for every build.
Does it help with tear-out?
Yes. Because the workpiece is supported closer to the blade, the wood fibres are less likely to break away at the cut line.
Can I use it for bevel cuts?
You can, but you need to check clearance carefully. Some setups work better with separate inserts or separate fence pieces for different angles.
Watch the Build on YouTube
If you want to see the build in action, watch it here:
Watch the zero-clearance fence build on YouTube
For more practical garage-shop projects and tool ideas, you can also subscribe to my YouTube channel here.
More Posts You May Want to Read
- How I Built a Zero-Clearance Fence Table for My Sliding Miter Saw
- The Simple Zero-Clearance Throat Plate Trick for Cleaner Table Saw Cuts
- Best Beginner Table Saw on a Budget for a Small Garage Shop
- How to Choose a Sliding Miter Saw for a Small Garage Shop
- Small Woodworking Shop Setup: Make the Most of Your Space